Monday 30 June 2014

Blendabilities - Tutorial

I promised you a video today - and here it is! I literally just recorded it!

I will add a disclaimer - no two people work the same and there is no right or wrong way to use Blendabilities. This is the technique that works best for me and I wanted to share!

Here is the card I made.


And some more Blooms - the stamp is called Blended Bloom and is available in the new catalogue tomorrow - along with a selection of the Blendabilities - ask me for details as there is a limited initial selection due to demand! Yup - They're that good!


I don't yet have the Pumpkin Pie or Daffodil Delight pens so the centres were coloured with Stampin' Write Markers... not ideal as they smudge the Memento ink.

Here is the video...


Sunday 29 June 2014

So long Secret Garden

Thank you to everyone who got in touch to ask about my holiday - we had a wonderful time - the temperatures went over 40 Celsius on a few days so I kept out of the sun with my fair skin!

I took over 600 photos and have managed to whittle it down to about 75 (whilst I was washing the holiday clothes!) for the PL album I am going to do...

Here are a few of the pictures...


The main church in Skala


Fishing boat going out at sunrise


Me sitting on a wall in Metochi


OK folks - this is it! You have about 18 hours to order this amazing stamp set, Secret Garden with matching framelits before it is gone for good!

I must admit I'm gutted to see it go - and whilst I've been falling in love with the Blendabilities - this is what I achieved with the Blender Pens.


Nowhere near as good as the Blendabilities but still stunning - here is the whole card...


Tomorrow I'm planning on showing you what I was practicing on the flights with Blended Bloom and my Blendabilities... as well as shooting a video tutorial so don't forget to check back!

Place an order from the new catalogue by 8pm on the 1st July and collect from me for FREE P&P!

Saturday 28 June 2014

Designer Series Papers...

OK - I'm heading home today so am feeling a mixture of emotions - I miss my animals - but I've had a fabulous holiday and wish I could stay here.

Having said that I have taken a ZILLION photos and my Project Life kit is calling - Though I think I'll need some more pockets and another set of cards!

I am a bit rubbish at using my DSP - I just like to stroke it - not cut it up!

Here are a couple of quick cards I wanted to share before the DSP retires...


This is the Retro Fresh DSP - 12 x 12 and the sentiment is from Just Sayin', cut using the Word Bubbles Framelits.


I've used the same framelits and stamp set here, but the DSP is from one of the smaller paper stacks (there are 2 in the new catty!) - they are perfect for card fronts and you waste less!

Well home tonight so hopefully I'll get a chance to post Monday at the latest... if I've caught up on the washing!

Thursday 26 June 2014

Colouring Practice

Hi Guys,

Before I came away (it is darned hot here by the way!) I had a chance to play a little more with my Blendabilities.

I think I'm getting the hang of them now. I really do!

What do you think?


I only have the Cherry Cobbler ones at the moment - I used my Stampin' Write Markers for the other colours.

Again this is the new Hostess Set - I Like You - available from the 1st July - spend £150 and you qualify to get it!

The sentiment is of course Sassy Salutations.

Can't believe I'll be home soon! But it will be nice to see the animals!

Tuesday 24 June 2014

Heat Embossing - another application!

Following the video I posted showing how to heat emboss I thought I would share this card!

I used Versamark to stamp images from the Flower Shop set on to the vanilla card stock - then embossed with clear powder. It gives such a classy, subtle finish - don't you think?


Here is a close up... stunning isn't it?


The little flower was cut using my Floral Fusion Sizzlit die. I really don't use it often enough!


Sunday 22 June 2014

Back to Basics... #6 Heat Embossing

Heat embossing is amazing - Truly it is!

It gives such a lovely finish to your cards - and adds another dimension.

So right now whilst I'm sitting here by the pool - why not take the plunge and give it a go.


Here is the finished card. The stamp sets are Perfect Pennants with the Banner Framelits and Flowering Flourishes.


And that gorgeous little bow? It's one of my fork bows made with a comb - see my You Tube channel for the how to video!


Friday 20 June 2014

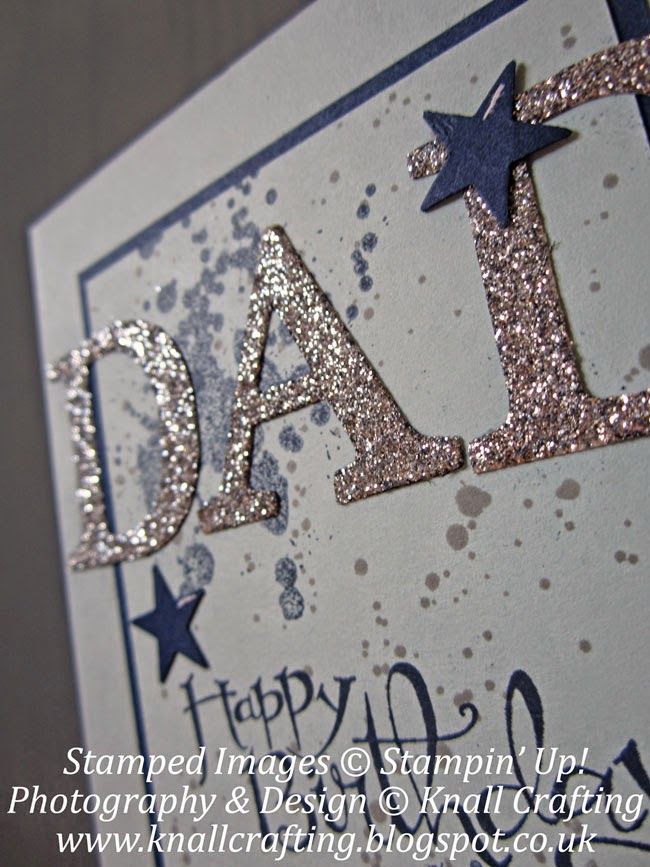
Dad Birthday Card

It was my Dad's birthday the other day and I gave him this card. I'm off to a tiny Greek island this evening. My amazing Upline is staying in the house for me looking after the cats (snake/rabbit and geckos) - she has even taken time off work so she can spend all day having kitty cuddles - Bless her! She is ace!


I just adore the Glimmer Paper and Gorgeous Grunge! The little button is one of the Basic Metal Buttons and the sentiment is from Sassy Salutations. These products are all available now!


I tied the button with a little Linen Thread. Just perfect for Masculine Cards! So order now as it's not in the new catalogue! Shock Horror!!


You can buy them now in my On-Line store - It's completely secure and if you choose not to let me see your details - the system can hide them from me if you want to remain anonymous! So your information is protected as much as you would want it to be.


Wednesday 18 June 2014

Framed Prints...

If you recall I was asked to be part of the design team for the Stampin' Up! Regional Training in the UK...

Here is a little something I put together... so I have had a couple of stabs at scrapbooking... It's just this was on a very small scale to showcase the new stamp set - Something to Say and the Itty Bitty Accent punches that coordinate with some of the images in the stamp set.


This was another of those Box Frames that I bought. Do you notice how I was able to stamp in Versamark on the frame and heat emboss those cute flowers?


I used the Ovals Collection framelits too. As well as a Scallop Circle and Circle punch.


I love the shape of the little heart - and the new big Sweetheart punch is a similar shape.

I'll be back soon with a picture of my Dad's Birthday Card.

Monday 16 June 2014

Project Life...

I'm not a scrapbooker... you may have noticed. I fancied it but had no clue where to start and am always daunted by the prospect of designing a whole 12x12 page!

Stampin' Up! obviously knew this and as I mentioned previously, they have teamed up with the amazing Becky Higgins, to bring us an exclusive selection of Project Life products.


I ordered everything I could on Pre-Order, and it's now available to you. Just check out my on-line store.

I have had the most amazing fun because I can break down my 12x12 page into sections using the Photo Pockets. So I don't have to make a huge page in one go.

I also bought the framelits, journalling pens, accessory pack, corner rounder and of course the Project Life card pack.

These are my creations. (never has my mobile phone camera had so much use!)


The card stock here was cut with the framelits and I rounded the corners with my punch.


I used my Label Bracket punch to make the labels.


The pre-printed cards are fabulous... and I may have rubbish handwriting but I don't mind as my notes are personal to me. I used the Scallop Border punch and the flower from the new Itty Bitty Accents set on the picture above.


How cool are these pages? Honestly I had a ball - it was so easy and I have totally changed my mind about scrapbooking - I can't wait to get the album... I am going to take some serious pictures on holiday next week.


I've not really exploited my Washi Tape - But I think this looks so effective. I may be officially converted!


More labels - this time using the Curly Label punch.


Again, as you can see here the pre-printed cards are fabulous and I even just cut backgrounds from my DSP. I'm sure you are bored with my pictures - But I simply can't express how much fun I had creating these!


Back soon with another new product!