Showing posts with label Designer Series Paper. Show all posts

Friday, 17 February 2017

Suite Sixteen - Lift Me Up! - Stampin' Up!

The Lift Me Up suite is absolutely fabulous and has co-ordinating Designer Series Paper that you can choose free if you spend £45.00!

The great news is you can still shop with me on-line even though I no longer have a Stampin' Up! hosted website!

Where does the Suite sweet sixteen bit come in? It was my amazing nephews 16th birthday. I can't tell you how proud I am of him, he is such a lovely young man and has done exceptionally well in his mock exams and is an exceptional sportsman!

I made him this card with the bundle for his birthday.


I was so pleased with the result!


Have a fab weekend! xxx

Wednesday, 14 December 2016

It's beginning to feel a lot like a Stampin' Up! Christmas!

Ho! Ho! Ho!

How are your seasonal preparations going? My cards have all been posted, my decorations are up, the turkey is in the freezer and my calendar is full!

I'm really excited to be spending lots of time with friends this Christmas and finish my 'day job' on Friday until the New Year! Whoo Hoo!!

I've been thinking about the boxes of retired product that often get neglected and this year have been pulling out bits and pieces, Designer Series Paper is something I can never resist and I took reams of it, cut into strips in to work and we spent our lunch break making the most beautiful paper chains!

I also designed this calendar to make in our December class... using a bit of old and a bit of new!


Fab isn't it?


Another use for retired DSP is different Christmas decorations - like these in my studio!


And while I was getting carried away in my paper box... I decided to make this for a special friend who LOVES orange. Just a slightly different version of the calendar.


Well you only have a couple of weeks left to order from the Autumn/Winter seasonal before the Spring/Summer one comes in the New Year! So please get in touch if you need any help or advice or if there's anything you need from me.

Just in case I get completely absorbed for the next couple of weeks... Have a fabulous Christmas!


Lots of Love

xxx

Tuesday, 2 February 2016

Stampin' Up! Sky is the Limit - Part 3

This is the final part of my 3 part spotlight on this fabulous stamp set.

Remember, spend £45 and you can get it FREE! Today is the last day for orders if you want to collect from me this month.

Here I used the stamp set and the Designer Series Paper too - you can get that too if you spend £90 - the more you spend - the more you get FREE!


How cute is that? I even managed to sneak in a bit of bling!


Back soon with some exciting projects - so please keep following me... Laters! xxx

Tuesday, 29 December 2015

Love Blossoms - Stampin' Up!

Hiya!

Hope you had a fab Christmas - I know I have... I can tell by how tight my waist band is and the empty bottles in the recycling! The days have flown by in the company of friends and family, interspersed with some lovely long dog walks and a little crafting (but not nearly enough!).

I had so many ideas of how I would spend the time off work - but that book I was going to read lays unopened on the bedside table and the SKY+ box is getting low on memory, simply because we haven't had time to watch TV!

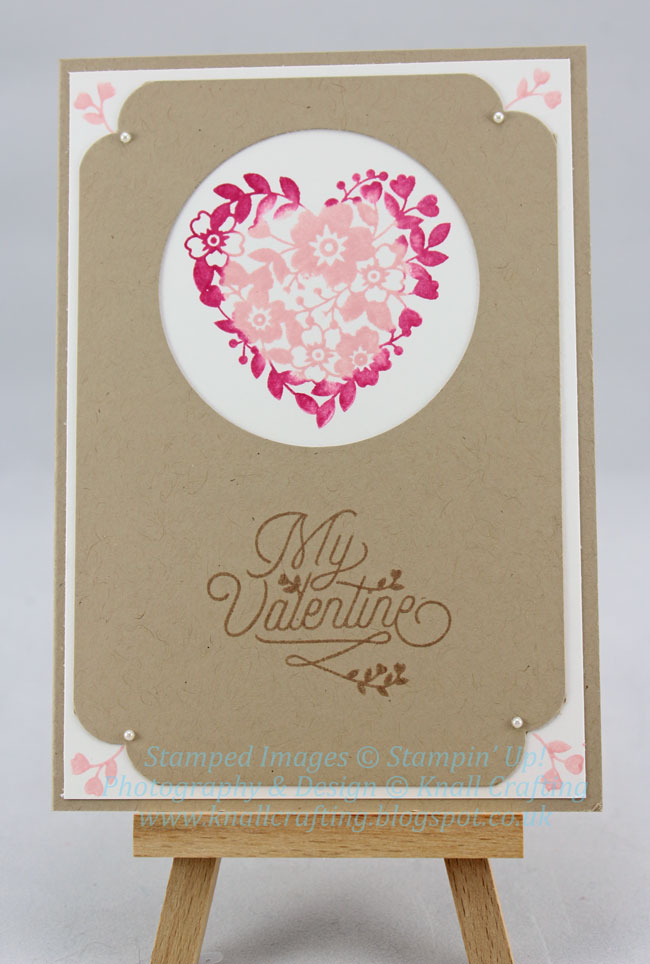
I have made some plans for January's classes though, these are some of the ideas... they are all using the Stampin' Up! Love Blossoms Suite... The Bloomin' Heart Thinlit Dies, Love Blossoms Designer Series Paper Stack, Blushing Bride Glimmer Paper, The Love Blossoms Cardstock Pack and Bloomin' Love photopolymer stamp set.

These co-ordinating suite's make designing and creating projects so easy! This suite is great for celebrating Love and Friendship and the classes are just in time to celebrate Valentines day in February - so why not order, or book your class now?


Thursday, 16 October 2014

Pillow Gift

By the time you read this I will be in Brussels, Belgium. I am bursting with excitement and wanted to spend the next 3 days sharing some items I prepared for convention.

It is a Stampin' Up! tradition to make a 'Pillow Gift' for your room mate. Now the lady I share with is super talented so it is really hard to think of things for her. This year these are my gifts...


I made the two little boxes and decorated them with Designer Series Paper, little flowers from Something to Say and Pearls coloured with my Blendabilities.


The first box contains 4 packs of mini Tic Tacs and the other a candle I decorated with the same DSP


It's a little hard to see but this box is double sided with the other 2 packs of Tic Tacs on the other side.


The patterned paper is Speciality Designer Series Paper - Gold Soiree and I just love this pattern!

Back tomorrow with one of my swaps!

Hope you'll stop by!

Monday, 14 July 2014

Shamelessly CASEd

I was watching Pinterest avidly looking for inspiration for next weeks class - That crafters block is improving!

I saw a card and loved it immediately - it is by a member of the Stampin' Up! Artisan Design Team.

This is my take on it and we will be making it in Monday's class!


The stamp set is Hello Darling and I used the Coastal Cabana Thick Bakers Twine and a Very Vintage designer button - coloured to match with Blendabilities! The flowers are heat embossed on patterned paper from the In-Colour Backgrounds Designer Series 12x12 paper stack.

I hope you love it as much as I do - I'll be showing some more of the cards we'll be making over the next few days. And you just HAVE to come by Saturday for the Pinkies Blog Hop.

Check out Connie Collins' original card on her blog Constantly Stamping


Saturday, 28 June 2014

Designer Series Papers...

OK - I'm heading home today so am feeling a mixture of emotions - I miss my animals - but I've had a fabulous holiday and wish I could stay here.

Having said that I have taken a ZILLION photos and my Project Life kit is calling - Though I think I'll need some more pockets and another set of cards!

I am a bit rubbish at using my DSP - I just like to stroke it - not cut it up!

Here are a couple of quick cards I wanted to share before the DSP retires...


This is the Retro Fresh DSP - 12 x 12 and the sentiment is from Just Sayin', cut using the Word Bubbles Framelits.


I've used the same framelits and stamp set here, but the DSP is from one of the smaller paper stacks (there are 2 in the new catty!) - they are perfect for card fronts and you waste less!

Well home tonight so hopefully I'll get a chance to post Monday at the latest... if I've caught up on the washing!

Sunday, 16 March 2014

Scallop Tag Topper Spring Box Tutorial

Hello Crafters!

The weather (I know I keep going on about it but I am British and it's what we do! LOL) has been fabulous so I thought I would share a photo of last nights' sunset - How gorgeous is that?


I promised to do a video tutorial for you for today... and I procrastinated again last night so have done it this morning... If I am honest I was too busy oogling Ricky Wilson on the Voice - I have a serious crush on him - he just comes across as such a lovely man. (Sighs)

Anyway, where was I? Oh yes video tutorial... here is what I made.


I designed them to hold a little gift I have made for the ladies attending my classes this week - I'll show you the little gifts next week. I just like to make a very little something for each attendee.

Anyhow - here is the video - You'll need a trimmer, scorer, Scallop Tag Topper Punch, Spiral Flower Die, Little Leaves Sizzlits, Sweet Sorbet (or any other) Designer Series Paper, Big Shot and adhesive.

I forgot to mention on the video that the offcut after you cut your 8.25" paper is just the right size to cut out your spiral flower so you can make two of these from each sheet of DSP. I have also given Metric and Imperial measurements.


Saturday, 17 August 2013

Framelit Partial Cut - Stampin' Up!

Sorry - I did it again! It was really late when our visitor left so I didn't post - and today I was doing the housework - then I got 'dragged' out to Prezzo's for supper - I am so full - I had 4 courses!!

Anyhow - here is one of the promised video tutorials.

I am often being asked how to make a card with a partial cut from a framelit. Making something like this -


Not sure if you can see - maybe this is a little clearer?


I used one of the Labels Collection Framelits and my Big Shot. Then decorated the card with my new Morning Post Numbers from the new catalogue coming soon (watch this space!), New Colour Collection Designer Series Papers and the hostess set - Simply Sketched.

Here is the tutorial on how to make one of these cards by making a partial Framelit cut...

You can decorate it any way you like!


I have two more videos to come over the next week so please come back and see!

I still have bookings available for September so why not give me a call on 07786 860438, or join my team and save on the products you buy.

Paula xxx

Tuesday, 18 June 2013

Sneak Peek Week - Day 4!

Yup - Back again, I do keep my promises most of the time.

Today's little offering is a bit of fun and shows just how versatile that Simply Pressed Clay is - Check out my little pink pig! See how he sparkles? It's hard to get it on camera but I mixed Dazzling Diamonds in too when I coloured the clay.


I tried to 'varnish' him with some clear nail polish - just to see if it worked - as you can see it was no-where near as effective as the Crystal Effects. So I know what I'll be using in future! By the way - I think I forgot to mention - the clay AIR dries so no baking!

The sentiment is from Perfectly Penned - This pattern DSP is also retiring as there will be all new designs on the DSP this year! Oh - sorry - DSP = Designer Series Paper.


Back again tomorrow with yet another creation! Hope to see you - and please do leave comments - I love to hear from you!

Pxxx

Monday, 11 March 2013

Maudlin on a Monday!

It didn't work! That cancellation request I put in... well Monday has arrived, it's still really chilly. I am avoiding having wet and muddy dogs by driving to a nice grassy field to walk. I know it's not very environmentally friendly, but it's better for the dogs that getting hosed down every day.

Blazey and I will be at Obedience Training later - Did you see the Obedience at Crufts? Yeah? well we aren't anywhere near as good as that! LOL But we have a good try. Blaze is too good for the intermediate class, so we've been bumped to the advanced class. If I'm honest it isn't because we are any good... it's because there were too many dogs and Blaze can hold his own in the higher class... just!

Today's card is entered in the Freshly Made Challenge for this week which is a sketch. The sketch should have been easy for me... until I realised I had made loads of similar cards, and I didn't want to replicate a past creation. So I sat and I thunk... I was stumped... and I stamped! A kiddy card! I will probably give it to my niece for her Birthday... if you click on the sketch it will take you to the challenge page.


http://freshlymadesketches.blogspot.co.uk/

The Designer Series Paper background is from the Floral District set, the Elephants are from the Feeling Sentimental Sale-a-bration set punched out with the Decorative Label, the brackets are from the Pretty Petites Sale-a-bration set and punched out with the Petite Curly Label, The little heart is from Love and Laughter.

I will be placing my final order during Sale-a-bration this friday - collections from me will have free P&P. If you want anything after Friday you only have until the 22nd and will need to pay £4.95 P&P.

Hope your week passes quickly! Roll on Friday I say! Don't forget to keep an eye out for some projects this week using blender pens and markers... if you don't have Markers I will be sharing a clever little alternative!

Pxxx


Monday, 25 February 2013

Hopeful Thoughts from Stampin' Up! PPA153

I hope everyone had a good weekend! It's such a downer going back to work! I vote for a 3 day working week!

Today is another card I created at the weekend. This one is to be entered in the PALS challenge here.

I seem to have a 'thing' going with leaves and trees at the moment, a theme to be repeated tomorrow so remember to pop back then too!

I used the Hopeful Thoughts set for the tree and the sentiment is from Bring on the Cake from the main catalogue. The flower is from the Secret Garden set in the Spring Summer mini and has been cut with the co-ordinating framelits. The colour combo is Certainly Celery, Bashful Blue and So Saffron. I used Designer Series Papers from the Subtles collection.


I accented the flower with some tiny pearls, adding the birds with a Stampin' Write Marker.

Here is the sketch - PPA153

I hope you have enjoyed today's card and look forward to you visiting tomorrow! Don't forget I love reading your comments so please share your thoughts on my work.

Paula xxx

Sunday, 21 October 2012

Stampin' Up! Scrapbooking

I hope you enjoyed this weekends Pinkies Blog Hop!

Before I started using Stampin' Up! products I had never heard of Scrapbooking, let alone tried it!

So here I am ten months later and I have created my first Scrapbook page!

One of my dogs won a class at an Agility competition that meant he has been promoted to the next level. He is now Grade 5. The highest is Grade 7. So as you can imagine I was so proud. So I decided my first tentative steps into the scrapbooking world would be to create a page in celebration of Blaze.


Don't you just love the detail on the Butterfly?


I used -
 
Colours - So Saffron, Pumpkin Pie, Lucky Limeade
Punches - Elegant Butterfly, Scallop Edge Border, Blossom, 1 3/4" and 1 1/4" Scallop Circles
Stamp Sets - Flowering Flourishes, Papillon Pot Pourri, Mixed Bunch and Lovely Letters Alphabet
Embellishments - Pearl Basic Jewels, Brushed Bronze Designer Buttons and some Bakers Twine
Designer Series Paper - Twitterpated
 
I would love your thoughts on my attempt so please leave a comment!
 
If you would like to buy Stampin' Up! products I can take your order and have it delivered to your door! Just give me a call on 07786 860438
 
Paula xxx


Friday, 12 October 2012

Stampin' Up! Christmas... and Demonstrator Benefits!

Just one of the lovely things about being a Stampin' Up! Demonstrator is that Stampin' Up! are very supportive. They are constantly keeping you updated, offering incentives and giving you ideas!

One of the things we receive is a monthly news letter. In this months edition was a wonderful idea for using up all those little off cuts of Designer Series Paper. I do so hate waste!

So here is my version of the card they showed in the magazine.


 I have used some offcuts of the Festival of Prints DSP, another little star punched with Glimmer Card and the sentiment from Greetings of The Season.

I rounded the corners by poking them into one of my Circle Punches.

I hope you like it!

If  you would like more information about joining as a Demonstrator then please get in touch!

There is no pressure as a Stampin' Up! Demonstrator - you order as little or as much as you like. If you choose not to meet the quarterly minimum. Your benefits stop but no-one puts pressure on you... and your Starter Kit is yours! Whatever happens. So you can get £130 worth of product for just £99 and don't need to do anything more. But the benefits if you do are amazing!

Give me a call 07786 860438

Paula xxx

Monday, 1 October 2012

Decorating Glass Jars with Stampin' Up!

Sometimes you are left with the most beautiful jars and it seems such a waste to put them in the Recycle Bin... Some are just crying out to be crafted with!

So here is a simple example of what you can do with a couple of  Stamp Sets, some Card, Patterned Paper and a Big Shot!


Just what to put in it? :-)

I used Twitterpated Paper then used the Windows Framelits dies to cut out, first the Summer Starfruit card stock, that I embossed on the Big Shot using the Square Lattice Embossing Folder, I Stamped the label in Raspberry Ripple using the Friendship Preserves Stamp Set, then cut that out too with the appropriate sized framelit.

A little tip when adhering something quite stiff to a rounded surface, to help prevent it coming unstuck is to place it in your palm and gently 'slide' it over the edge of yout table, this causes it to curve so it will stick more firmly without wanting to come unstuck!


The flowers were stamped from the Mixed Bunch Stamp Set, Raspberry Ripple and Summer Starfruit ink and punched using the Blossom Punch and the 1" Circle Punch. I added one of the larger pearls to the centre and the leaves can be hand cut! I cheated though and used the Ornament Framelit that is the perfect shape and my Simply Scored scoreboard to add detail.

The ribbons are the Old Olive 1/8" Taffeta on the lid and 3/8" Taffeta in Certainly Celery.

To finish off I thought the lid needed something more than just the ribbon...


Here I used all 3 sizes of the Scallop Circle Punches and embossed each one, I used the Perfect Polka Dots, Square Lattice and the Elegant Bouquet Embossing Folders... and added another leaf to finish.

This was a fun project and enabled me to showcase lots of my Stampin' Up! supplies, you don't need to use quite so many products to create a similar project.

Why not give me a call or post a comment if you would like me to make some suggestions as to how you could do something similar?

Remember - if you become a demonstrator you can receive product in your Starter Kit to the value of £130 for just £99! And don't forget if you join in October or November you also get FREE Designer Patterned Papers!


Paula xx