Showing posts with label Big Shot. Show all posts

Monday, 6 October 2014

Holiday Home Treat Boxes

I had such a busy weekend and I was hoping to chill out as hubby was away! No such luck. I don't think I sat down for five minutes.

I have had lots of requests for some more video tutorials so spent the whole of Sunday filming and editing! Literally from 7am until 11pm!

Here is something I thought was so cute - and I know you all love little treat boxes.


How neat are they? There are so many uses I can think of... advent gifts, home warming gifts, Xmas tree decorations. The list goes on!

I used the Holiday Home stamp set and corresponding Homemade Holiday framelits. The same ones we are using for our class tonight!

Here is the video tutorial.

Thursday, 7 August 2014

Hot Diggity Dog class - 26/08/14

So here I am with time on my hands and crafters block again! Must be the lure of the sunshine...

I have a couple more cards I made using the Hot Diggity Dog stamp set - we are using this in class on the 26th and I still have a space if you are interested!

***EXTRA DATE NOW AVAILABLE - 1st SEPTEMBER 7:30PM - Contact me to book ***

The kit for the class includes the stamp set, ink pad and Stampamajig... if you have any of these elements you can change them for something of equal value for your kit.

The first card I admit I cheated and used my retired wheel for the pawprints... it had to be done!


I used Blendabilities to colour the Pug's face - ain't he cute?

Next one uses the Big Shot for the Labels Framelits and the Beautiful Wings embosslit...


Lastly I used the Windows Collection Framelits and the Itty Bitty Accents punch pack for this card.


Hope these give you a little inspiration and look forward to seeing you at a class - or sharing your projects!

I am placing an order on the 10th, so if you can collect from me give me your order and you'll save postage!

Monday, 4 August 2014

Big Shot... What is it? What can it do for me?

So if you are tempted by the current offer but are unsure what the Big Shot does... Here is a short video.


Can you spot where I used the Big Shot to make this card? I also used Blendabilities and the Hello Darling stamp set.


Sunday, 3 August 2014

What have I missed? Well just got home to another amazing deal! BIG SHOT!

Such an amazing deal - buy a Big Shot and get a FREE Stamp Set and Die Bundle...

Already got a Big Shot? Then take advantage of these exclusive deals to get a stamp set and matching dies for 15% less!


Tomorrow I'll post my little Back To Basics - Big Shot video - can you believe Stampin' Up! have also done one! But mine went on YouTube first! LOL

Here is more detail on the offer...


Any one of the bundles below FREE with the Big Shot!!! Just add the Big Shot to your order and then enter one of the codes below when prompted for your FREE Bundle... then add as many of the other bundles as you like to your order to take advantage of 15% discount on each bundle!


Friday, 4 July 2014

New 'Stuff'...

Hello people!

I've been a bit quiet this week, catching up on stuff after my hols, preparing accruals and forecasts at work and most importantly placing my order from the new catalogue. Have you had a chance to look yet?

I'm going to have an intensive week of crafting next week when my new goodies arrive, as I have been so busy blogging, running classes and doing my full time job I have really missed out on the crafting.

I'm sure you'll forgive me when I have loads of exciting things to show you.

Anyhow, this was a little something I did a few weeks back using the Life in the Forest set.


I sponged the little hill and used my stampamajig to get the placement of the mouse. Cute isn't he!

The sentiment retired on Monday and the speech bubble was cut using the Big Shot and the Word Bubbles framelits. The embossing was using the Decorative Dots embossing folder.

Don't forget you can order 24/7 - no matter where you are in the UK!


Friday, 2 May 2014

Hand Embossing The Open Sea

Today I'm sharing a video for an ideal masculine card for any occasion!

The technique at the beginning of the video is one of the first things I learnt at our quarterly training when I first joined the Pinkies. If you would like to join my team you will also benefit from the fabulous training and social opportunities as well as being part of such a big supportive network of crafters!

Anyhow, back to the card. I have used, The Open Sea, World Map, Burlap Ribbon, Linen Thread, Natural Designer Buttons, Envelope Punch Board, Circles Framelits and my Big Shot.

Check out the video below and visit my YouTube channel for other fabulous tutorials!


Sunday, 16 March 2014

Scallop Tag Topper Spring Box Tutorial

Hello Crafters!

The weather (I know I keep going on about it but I am British and it's what we do! LOL) has been fabulous so I thought I would share a photo of last nights' sunset - How gorgeous is that?


I promised to do a video tutorial for you for today... and I procrastinated again last night so have done it this morning... If I am honest I was too busy oogling Ricky Wilson on the Voice - I have a serious crush on him - he just comes across as such a lovely man. (Sighs)

Anyway, where was I? Oh yes video tutorial... here is what I made.


I designed them to hold a little gift I have made for the ladies attending my classes this week - I'll show you the little gifts next week. I just like to make a very little something for each attendee.

Anyhow - here is the video - You'll need a trimmer, scorer, Scallop Tag Topper Punch, Spiral Flower Die, Little Leaves Sizzlits, Sweet Sorbet (or any other) Designer Series Paper, Big Shot and adhesive.

I forgot to mention on the video that the offcut after you cut your 8.25" paper is just the right size to cut out your spiral flower so you can make two of these from each sheet of DSP. I have also given Metric and Imperial measurements.


Monday, 16 December 2013

Last Christmas...

Well possibly the last of the Christmas cards I am going to post this year. Though I may post a couple more things before I finally tuck away my Christmas goodies until next year!

Just recently I have had a lot of people visiting my blog - so I would like to thank everyone who shares my posts or 'Pins' my creations... Thank you!

This first card was inspired by something I saw on Pinterest myself - it is such a fabulous source of inspiration.


I used the Ornament Keepsake Framelits to cut the aperture in the mat, then behind it I layered some of the silver foil sheet, embossed with the Delicate Designs embossing folder. The patterned paper is from the Winter Frost Speciality Designer Series Papers and the sentiment is from Greetings of the Season.


The snowflake from Festive Flurry was stamped in Versamark, I added Heat and Stick powder then Dazzling Diamonds before cutting it out on the Big Shot using my co-ordinating Framelit dies. Just gorgeous!

Here is another card made using the Festive Flurry set - this is a complete contrast as it is a simple layer stamped in Soft Sky then the sentiment from Sassy Salutations was added in Marina Mist. Lastly I added a couple of rhinestones.


Finally another Festive Flurry, This time I alternated layers of Silver Glimmer paper with the printed snowflakes. And I used the Northern Flurry embossing folder.


Back soon - in the meantime please keep sharing and Casing and I hope you find inspiration here.

Paula xxx

Thursday, 24 October 2013

Loving those 'Flip' Cards...

And they are incredibly simple with Stampin' Up! goodies, the Thinlits dies and your Big Shot...

Just a couple I made yesterday. I used the Thinlit Card Die sets, The Santa from The Best of Christmas, the Season of Style Designer Series Paper, Some of the lush Glimmer Paper and a little of the 1/8" Silver ribbon.

Oooh - just loving these!


And don't you just LOVE the co-ordinating Cracker made using the soon to be released Envelope Punch Board!


I used the Scallop Border Punch on the ends and the lovely Cherry Cobbler Stitched Edge Grosgrain ribbon.

Back soon!!!!

Paula xxx

Saturday, 21 September 2013

Blooming With Kindness

Here is my second Scheduled post to keep you entertained whilst I'm sunning myself on a remote Greek Island!

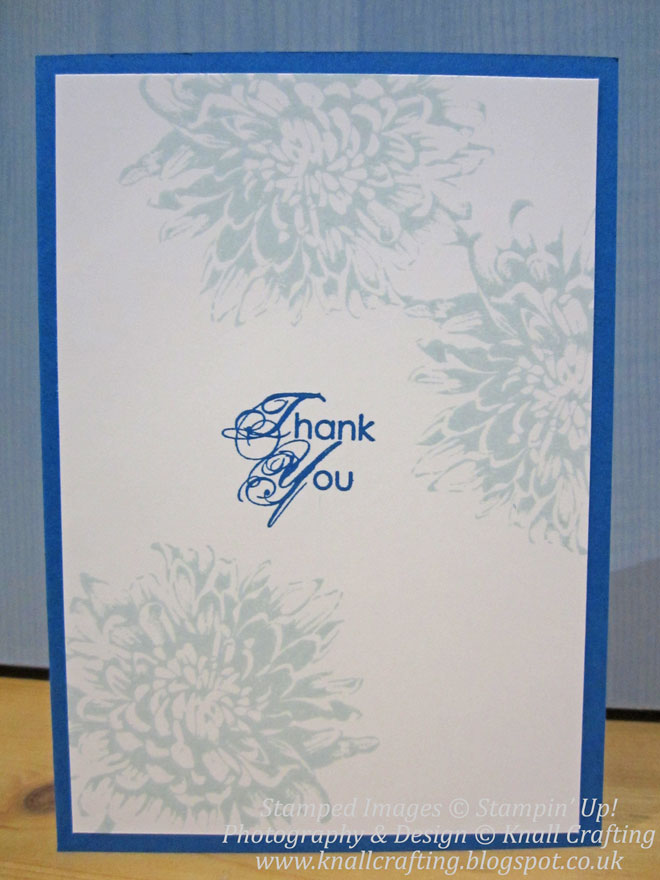
This is a 3 card example of different colourways of a Thank You card I made using Blooming With Kindness.

Again - they are simple cards, so you don't need any special tools. Don't forget you can order On-Line wherever I am in the world as Stampin' Up! distribute directly to you!


I'm not sure if I've posted this one before - but I used the masking technique to partially stamp the same stamp set on this card...


And finally - whilst I'm focusing on this set, here is something a little more complex, though dead simple to make.

The bottom of the card was trimmed off using the Large Scallop Framelit and my Big Shot, a further piece of cardstock was cut with the same framelit then embossed using the Big Shot and the Delicate Designs embossing folder. I added the Pink Pirouette Taffeta ribbon, then stamped the flower on an offcut of card stock, added the sentiment and punched it out using the Large Oval Punch.


I hope you are inspired by what I have shown you today, don't forget if you have any question on using any products or would like to see a demonstration, just let me know and I'll help as soon as I can.

Wednesday, 18 September 2013

Hostess Only set...

Today's post contains some really simple single layer cards, all made using the Hostess Only set - Simply Sketched. These Hostess sets are only available to be purchased using Hostess Pounds or On-Line Rewards.

This particular set just ticked all the boxes for me - I will just say - you are not limited to buying Hostess sets with your rewards... you can spend them on anything from the catalogues.

I'm not going to write very much more as I think Simply Sketched speaks for itself...

This first card is the most complex - I heat embossed the poppy on Vellum, dry embossed the top and bottom edges of the Vellum using the Needlepoint Border embossing folder and my Big Shot.


This second card, I coloured the poppy using my Stampin' Write Marker and used the sentiment from Million to One.


This card I coloured using ordinary coloured pencils to follow the Sketch theme.


This is another where I used Million to One. I just love the big bold sentiments in the set.


Finally the little bird was also coloured using my markers and a Blender Pen.


Hope you'll pop back for another post soon!

Paula xxx

Saturday, 14 September 2013

A little Grunge... Masculine Card

OK folks - this is my last post before my holiday, during which there are some scheduled posts coming up, including a video tutorial.

I cased the technique from Darlene Devries. I just love her video tutorials!

This card has a Very Vanilla base, sponged lightly round the edges with Crumb Cake ink. The next layer is another piece of Very Vanilla, this time sponged a lot more liberally with the Crumb Cake. then I inked up my En Francais background stamp, dabbed it with a babywipe and stamped it on top, lastly I wet my fingers and flicked water at it! That left some great watermarks.

When I get my freebie, Gorgeous Grunge at Convention I expect you'll see more cards like this!

I ran another strip of VV through the Big Shot using the Square Lattice embossing folder, and again sponged the edges.

Lastly I printed the sentiment from Chalk Talk, cut it out on the Big Shot using the co-ordinating framelit and popped some dimensionals on the back before sticking all the layers together.

I was really pleased and it was a step completely out of my comfort zone.


Don't forget to place your On-Line orders whilst I am away and if you need anything I will probably be able to check out my e-mails!

See you soon!

Paula xxx
Tuesday, 27 August 2013

Less is More Challenge.

OK - So I didn't post on Sunday, but hopefully you'll let me off! I had a frantic weekend travelling all over the South of England and with visitors yesterday. The problem is I have been doing lots of crafting and have LOADS of things to show you.

Today is a challenge entry for the Less is More Blog. HERE

This weeks challenge was to use Washi Tape... now I am a complete Washi virgin... in fact until I saw it in the latest SU catalogues I had never even heard of it. And in all honesty I'm still not sure I know what I am supposed to be doing with it!

The new Seasonal Catalogue out on the 29th (yes watch this space!) contains a lovely set of Washi Tape as part of the Season of Style family of products.


They are seasonal themed products and I have also used the Season of Style DSP (Designer Series Paper) for the ornament, I cut it out using my Big Shot and the carryover Ornament Framelits. I have also added a piece of DSP punched using my Mosaic punch and the tiny silver ornament was punched from Glimmer Paper using the carried over punch from the Merry Minis punch pack.

The Noel sentiment is another carry over item from the set Greetings of the Season using the new silver metallic ink.

Lastly that pretty scallop at the bottom was cut using the Large Scallop edgelit and embossed with the co-ordinating Delicate Designs embossing folder.

I'm not sure if it is a step too far but I had great fun making it - so who cares?

I have a few parties booked to correspond with the seasonal catalogue launch - but I still have dates available if you would like to book - just give me a call. xxx