Showing posts with label Blender Pen. Show all posts

Saturday, 12 March 2016

Stampin' Up! Sunny Saturday - Birthday Blooms

It's a beautiful sunny day here and I'm excited to be going out later to a gig with my friend Lesley and a couple of others... preceded by an Italian meal! Nom Nom!

In the meantime I just had to share this stunning card, sometimes I get flashes of inspiration and I really loved this effect!


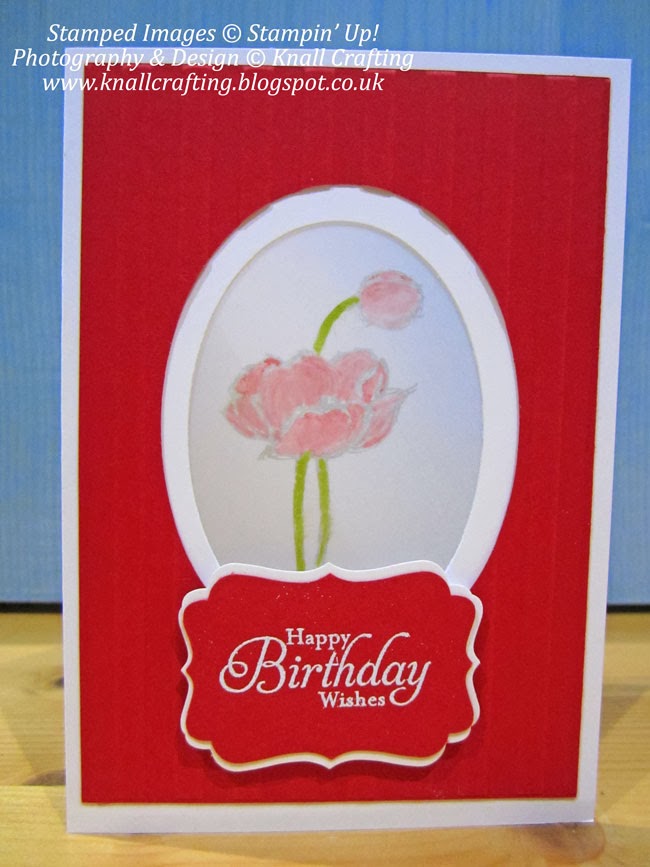
Isn't it beautiful? I used the Birthday Blooms set, my score tool, Blender Pens and Vellum. I've done a video tutorial for you to follow if you would like to have a go...


I just adore the subtle colours.


Here you can see the raised effect that embossing the Vellum creates - it's a really tactile card.


I cut the frames using the Lots of Labels Framelits.

Have a fabulous weekend!

Paula xxx

Wednesday, 11 June 2014

Last Chance!

Well I only have a week until I go away on holiday... so today and tomorrow I am sharing two projects using stamp sets that retire on the 30th of June... so order them while you can!

The first... which I'll be very sorry to see go is Happy Watercolour.

This is a little project I made using my Blender Pens.


The sentiment is from Bring on the Cake - also retiring!

The gorgeous butterflies are from the Beautiful Wings embosslits.


I hope you like it and I'll be back tomorrow with another 'retiree'.

Pxx


Sunday, 27 April 2014

Swallowtail

I held off buying this stamp for quite a while as I was unsure what to do with it... But I have seen so many beautiful cards... and I just love it so much!

Of course it goes really well with Papillon Potpourri, the focus for the card classes in May (contact me for details if you are interested). The main sentiments I have used are from Sassy Salutations... the 'Good Luck' one is retired.

Here are a few of the cards I've been making.


The detail in this stamp is exquisite! Here's a close up of the yellow one with the butterfly punched out of Papillon Potpourri with the Elegant Butterfly punch. I coloured it with a Blender Pen


Hope you'll pop back soon - I have some great ideas 'brewing'!

Monday, 7 April 2014

Flower Fun

I have to apologise for my lack of posts - it was my wedding anniversary at the weekend and we also had our 6 year old niece to stay... it's hard work entertaining small children. I hope you had a fab weekend!

To top it all it is year end at work so I was at work for twelve and a half hours today! And I have an awful feeling I'm coming down with a strep throat.

It never rains...! Anyhow, to brighten my mood (before I take to my sick bed) I thought I would share this card I made a while ago.


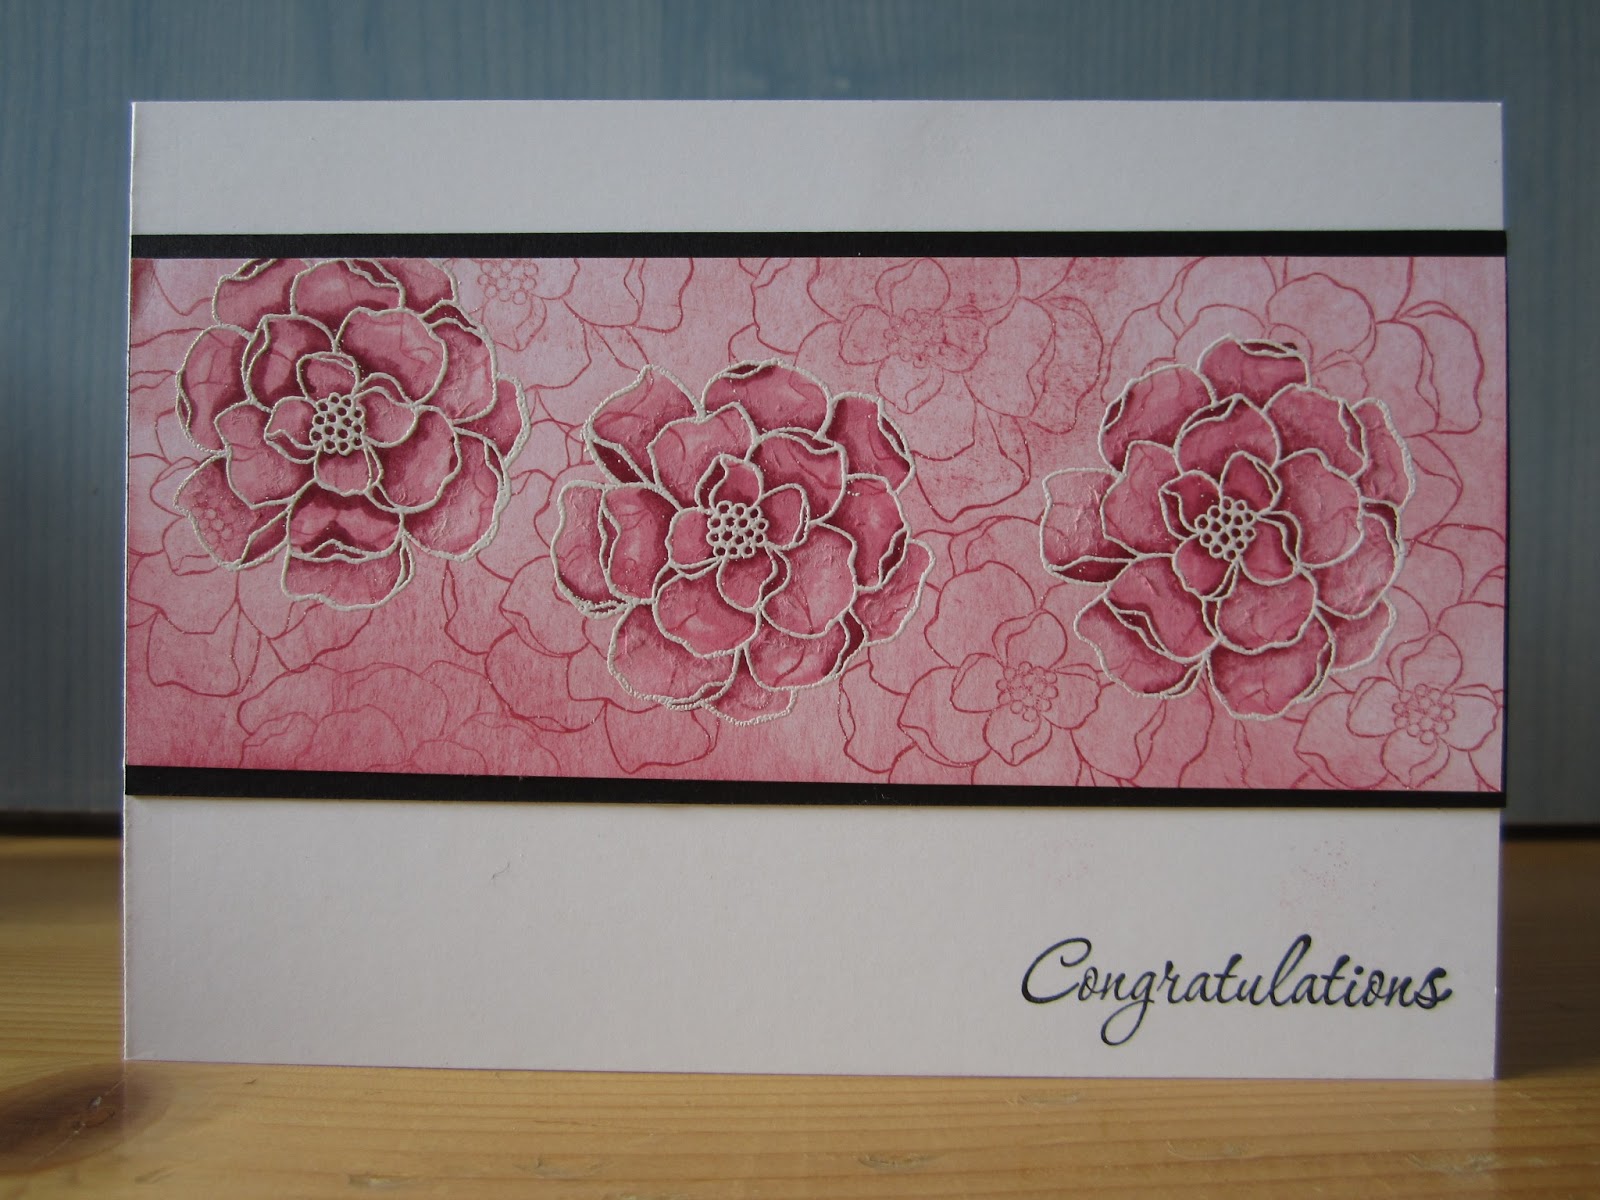
The flowers are from Secret Garden, embossed in white embossing powder then coloured in Calypso Coral with a Blender Pen.

The leaves were fussy cut from Simply Sketched after I heat embossed them and coloured them in the same way. (I love those leaves!)

Finally the sentiment was stamped using the Perfect Pennants set. I really like this card and must knuckle down and make some more!

Hope you like it too!

Pxxx

Sunday, 23 March 2014

Floral Home Decor

This weekend I have had a love affair with my Spiral Flower Die... I admit, when I started I had no idea how this would turn out... and now? I am so in love with this project and I have something completely different to show you tomorrow that involves sewing.

But for now this is what I made...


I coloured the dowel by simply rolling it on my Gumball Green ink pad!

The roses are made using Crushed Curry card stock and sponged on the edges with Tangerine Tango on a Sponge Dauber.


The butterflies are from Papillon Pot Pourri, I stamped them in Soft Suede and then coloured them using Blushing Bride and a Blender Pen. They were punched out with the Elegant Butterfly punch.


I hope you love this project as much as I do!

Back tomorrow with something completely different!

Pxxx

Saturday, 15 March 2014

It's the weekend!

I hope you are having a fabulous weekend! I extended mine by taking half a day holiday from work on Friday... that meant I got all my chores done, giving me the whole weekend to myself.

Today I couldn't get motivated! I did walk the dogs four miles and mow the grass though.

This is a card with one of the Saleabration sets, You're Lovely. I wasn't sure about this set at first but now I love it... I think this card clinched it for me. It's so simple and elegant.

What do you think?


The colour added to the stamped image across the middle was added using my blender pen... as was the colour added to the flowers and leaves. I think the silver glimmer card looks gorgeous as an accent here.


I'm thinking about sending it to my Mum for Mothers Day...

If you would like this stamp set for FREE then place an order for at least £45 and you can select this as your FREE Saleabration item... place an order for £90 and you can select another Saleabration item too! There are no limits on how many items you can have AND if you place an order for £150 you can choose 3 Saleabration items and get £25 to spend FREE.

I'm cooking supper tonight (I don't cook!) so have to go now... but I'll be back tomorrow with a little video tutorial for a little gift bag/box... See you tomorrow!

Paula xxx

Saturday, 1 March 2014

More Tulips...

Well - today the sun has shone and what a blessed relief with all the rain we've been having. Mind you despite the sun the footpaths are still a quagmire!

The dogs have been walked, the housework and washing done, the animals cleaned out, hubby is out for the evening so I'm treating myself to an evening of pure crafting! I expect to have some lovely things to show you!

Speaking of lovely things - my love affair with Blessed Easter continues with this little lovely!


I heat embossed the flowers, colouring them with my Blender Pen... cutting the panels with the Squares Framelits, dry embossing the top one with the Perfect Polka Dots embossing folder.


You can see more clearly here how I layered them.


Lastly I heat embossed the sentiment from Simply Sketched - the hostess set and punched it out using the Decorative Label punch before sponging the edges with white craft ink.

I'm really pleased with the result and now I'm off to hide away and craft to my hearts content... interruption free! I'm a little excited too as I'm making my first ever visit to Costco tomorrow... I'm thinking I should leave the credit cards at home!

Enjoy your weekend! xxxx

Friday, 27 December 2013

More Vellum...

Just before Christmas I posted my Pop Up flower card as an example of something else you can do with Vellum - well today I have a couple more cards to show you with 3 techniques for Vellum.

This first card is the simplest - I have used the World Map background stamp on the Vellum, The Open Sea and Simply Sketched stamps with the Decorative Label punch, the aperture is cut using the Ovals framelits, the Map stamped on the opaque Vellum gives a really interesting background.


For the second card I stamped the Poppy from Simply Sketched on the Vellum - then coloured it with my Blender Pens. I have again used the Decorative Label punch and Ovals framelits. The colouring technique gives a really soft effect.


Lastly - and again really simple but so effective is the use of embossing folders on Vellum. I have used two different ones here - the Adorning Accents and Needlepoint Border.

You will also see I have used the Expressions Thinlits for the word Love... only available until the 1st of February.

Have you noticed the Sneak Peeks I managed to sneak in here? The Decorative Dots embossing folder and the Banner Blast stamp set with coordinating punch will all be available from the end of January - you will be able to select from one of these or the other fabulous items free with orders of at least £45 during Sale-a-Bration.


Anyhow - that's all from me today. I hope you had a lovely Christmas and are looking forward to the weekend as much as I am - especially as I am getting a new hairdo, hubby is off out and I'll have 2 whole days to myself for crafting.

Pxx


Friday, 9 August 2013

Floating Butterfly Card

I'm off to play with a new stamp set in a minute - but I didn't want you to feel neglected!

I got the idea for this card from good old Pinterest... And with my new found love of Window Sheets decided to make a version myself.

You adhere a piece of window sheet to a single layer of card stock so the fold of the card is between the two... Does that make sense? It doesn't sound like it so here's the picture so you can see...


Then when you adhere your element - it could be a bird/bee/flower, anything. It looks like it is suspended in mid air.

I used an image from the Best of Butterflies set and coloured it using my Stampin' Write markers and a blender pen. The flourish is from Flowering Flourishes.

Here's a picture face on.


The sentiment was stamped in Stazon and is from Blooming with Kindness. Hope you like it!

I have such a busy weekend - I'll hopefully be back to post soon. xxx

Pxx

Thursday, 6 June 2013

CAS Colours and Sketches Thursday.

I hope I remembered correctly the theme for today - Unfortunately due to home commitments I had to pull out of the Design Team - But I love to support the ladies who put so much effort and hard work into running the challenges. It is a big commitment! Visit CAS Colours and Sketches Blog - HERE

So here is today's card - The only retiring item on here is the Curly Cute stamp set - it's immensely popular and one I shall probably keep hold of as I love it so much!


The leaves are from Stippled Blossoms and the flowers from Secret Garden... I coloured them using a Blender Pen - I love how subtle and elegant they look! And they were cut out using the corresponding Framelits.

Well hopefully as you read this I 'should' be enjoying the sunshine in Tuscany... If not it's wet and miserable and I wish I was crafting!

Take care and I'll be back soon with another post!

Paula xxx

Saturday, 13 April 2013

Floral Fantasy

Yup - It's Saturday! Today is the big housework blitz, then I only have 3 days at work next week as I am off to Newbury Showground for an Agility Competition.

Poor old hubby gets left at home to look after the rest of the animals!! I need to make the most of my last weekend away in the camper - though it will be mega busy as it is our (Wallingford Agility Club) show so I'll be working hard all weekend!

Today's little floral fantasy uses Secret Garden again.. I have stamped them on Vellum and coloured them using my Blender Pens. Finally to give them a little shape and texture I 'embossed' them using my Simply Scored tool, with the flowers rested on my Piercing Mat.


Sooo - What do you think? Likey Lighty, no Likey no Lighty!  I was able to give the leaves some definition... I like that a lot!

I may not have a chance to post tomorrow with all my household chores I might not get time to craft tonight, either way, pop back and check - and have a great weekend!

Pxx

Saturday, 30 March 2013

CASE'd card

Many crafters are familiar with the term to CASE, if you aren't it means to Copy And Share Everything.

Last week I CASE'd the lovely Darlene DeVries, one of my very first customers was inspired by Darlene's work and contacted me to buy her Stampin' Up! products.

Darlene did a video tutorial and I decided that although I didn't have any watercolour pencils I could tweak it a bit and use my Stampin' Write Markers and a Blender Pen.

I also used white embossing powder for the flowers.

Here is my card, using the Secret Garden Stamp Set.


You can visit Darlene's blog here and watch her amazing video tutorial.

Thanks for coming back today and I hope you'll come back again soon to see what I have to share!

Paula xxx

Wednesday, 13 March 2013

Pampering

Ahh, yes! After a rubbish few weeks I am off to the beauticians this afternoon - not a lot they can do about either my face or my physique - and surgery is out of the question, but it will be nice to be pampered for a bit, and probably the last time I'll be able to afford it until Chris gets himself sorted with a job. He's having to give up kitchen fitting because of his back problem. Please keep your fingers crossed!

Today's card is yet another colour challenge - this time from the PALS team - click on the challenge image at the bottom to visit the blog.

This is another example of colouring with the blender pens. I've never tried it on coloured card stock, and if I say so myself, it works surprisingly well on the Crumb Cake.

This card goes to show, you don't need lots of punches or dies as you can fussy cut the flowers - so if you are new to stamping you can still make stunning cards even if you have resisted the urge to buy loads of equipment.

The two stamp sets I used are Secret Garden and Perfectly Penned. I hope you like it!


Until tomorrow TTFN!

Pxxxxxxxxxx

Tuesday, 12 March 2013

Bordering on...

...something. But not sure what! I am on a course at work today, so it could be an 'interesting' day. You know how these things go. Sometimes you just wonder how anyone thought up a course on the subject. Now if it were a crafting course I would be much more 'up for it'.

Today's post is the first of 3 showcasing some colouring - it is an entry for Dynamic Duos challenge this week which is to use Pool Party and Lucky Limeade. I'm not keen on Lucky Limeade... so I hope this card is OK as it is definitely not a combo I would have chosen myself. If you click on the Dynamic Duos image in this post it will take you to the challenge blog.

So this is my take on the challenge.


I embossed an image from Bordering on Romance with pool party embossing powder on Vellum cardstock. I then coloured the images using a Blender Pen. Now I would like to have used my Stampin' Write Markers but don't have them in the 2011-13 in-colours, so how did I do it? If you squeeze your stamp pad gently before opening it you have a pool of ink on the lid. Dip in your Blender Pen and you can 'paint' with it. Awesome! I do love the way the ink takes on the Vellum, such a soft effect.

I love to hear what you think and love to see how you manage to use different techniques. Please leave a comment and if you like, a link to your own creations!

See you again tomorrow! xxx

http://thedynamicduoschallenge.blogspot.co.uk/


Saturday, 9 February 2013

Pinkies Blog Hop - Part One!


We’re so glad you could join us on Part 1 of the Pinkies Spring/Summer Blog Hop. We are showcasing lots of gorgeous projects using products from the new Stampin’ Up!® Spring/Summer Catalogue. We have so much inspiration to share with you we will be offering two Blog Hops - Part 2 will be tomorrow (Sunday 10th February). Simply use the buttons at the end of each post to keep on hopping. Do come back tomorrow to see what Part 2 has in store. We love comments, so please tell us what you think!
 
If you have arrived from Nicole's Blog, I hope you enjoyed her focus on the Just Married stamp set. These Blog Hops are such a source of inspiration!
 
I have focused on some cards using the Secret Garden Bundle. It incorporates the Stamp Set and Framelits, buying as a bundle also saves you 15% on the price of the items bought seperately. There are 3 cards for you to try at home.
My first card also uses the Top Note Die, Organza Ribbon and large Pearls. The colour scheme is Rose Red and Pretty in Pink. I coloured the flowers using a Blender Pen and ink from my pads - to do this you press on the pad when it is closed and it deposits some ink on the lid for you to pick up with the tip of the blender pen. Simples!
The sentiment is from the Bring on The Cake set.
My second card is yet again pink, but this time I have used the In-Colour Primrose Petals Ink Pad. I have cut out an aperture in the card using a Window Frames Framelit and used a slightly smaller one for inside the card. One of the fantastic things about the new style ink pads is the coverage, it means you can stamp again without re-inking and get shades of the same colour - which is how I have ended up with so many different coloured flowers.
The sentiment is from the Just Believe set.


On a similar theme I created an aperture in my final card using one of the Labels Collection Framelits, the colours are Wild Wasabi and So Saffron. The Secret Garden set means you really have plenty of scope to jazz up the cards as much as you like!

The sentiment is from the Petite Pairs Set. And that gorgeous stripy Designer Series Paper is from the co-ordinating Subtles pad of 12x12 papers. Don't despair - If you don't have a Big Shot - you can still snip out these little beauties by hand!


I hope you have enjoyed my projects as much as I enjoyed making them. If you would like to know more about Stampin' Up! Would like to hold a party, or place an order, go to the links at the top of the page and get in touch.

Do take the time to carry on round the Blog Hop and leave messages when you find something you like. We all love to hear what you think of our projects and whether you have been inspired by something you have seen.

The next stop is Diana's Blog, why don't you go and take a peek at what she has been up to?
Thanks for stopping by!


Part 2 of the Pinkies Blog Hop starts HERE so why not have a look around that too! There are loads more stunning projects to see. Have fun! xxx