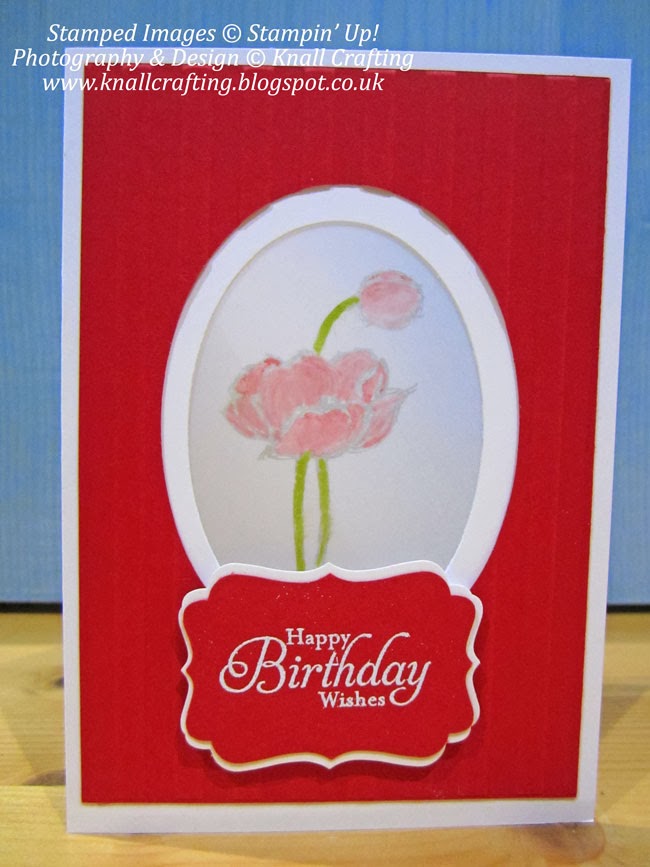
Good afternoon! Today I'm sharing a few cards made with just one set - Birthday Blooms.
I was really disappointed when Stampin' Up! withdrew their Blendable markers. So the first few images show you really don't need alcohol markers to colour beautiful images... the last is a little self indulgent as I did buy a set of Spectrum Noir markers... I'm still learning but am going to be doing a set of amazing classes from Kit and Clowder. (Link at the end!)
These first two are made by embossing the Vellum then colouring with my Blender Pens
I also used Blender Pens here - not perfect but It's the colour combo here that I love! Oh - and the fabulous Lace Trim and Duet Banner punch.
This was coloured with Aqua Painters after first stamping the image with Versamark and using Clear Embossing Powder.
This was another one with the Aqua Painters, but I used Archival Ink so it wouldn't run when I added the water.
This last image was coloured with my Spectrum Noir markers - I may have opted for a different manufacturer if I had realised the limitations of these pens... But they're probably perfect for me to get started with!
If you would like to start colouring you won't go wrong at all joining one of Alyce's classes at Kit and Clowder - she is AMAZING!
http://www.kitandclowder.com/
Check out her group on Facebook too - but only nice people are allowed to join - I couldn't believe what a lovely, encouraging and generous group they are!
https://www.facebook.com/groups/kitandclowder/
Take care all!
Showing posts with label Vellum. Show all posts
Saturday, 22 July 2017
Friday, 20 January 2017
So In Love - Stampin' Up!
Well I've been so busy with products from the new catalogue. They are just gorgeous and this stamp set sums it up! So In Love co-ordinates with the So Detailed Thinlit dies and if you buy the bundle you save 10% and so easy to make it up to £45 to get a FREE Saleabration gift too!
The first card is so simple I just love it - I stamped one of the images in a circle then used a stamp from Papillon Potpourri on Vellum, punched it out and voila!
This next card uses one of the thinlit dies...
I coloured it with my Aqua Painter... Isn't the die ... 'to die for'? And here it is a bit closer up!
I've got so many samples lined up I may be posting quite a bit for a while! Watch this space!
Tomorrow I'm showing you another new stamp set! And the cards we're making in February's class!
The first card is so simple I just love it - I stamped one of the images in a circle then used a stamp from Papillon Potpourri on Vellum, punched it out and voila!
This next card uses one of the thinlit dies...
I coloured it with my Aqua Painter... Isn't the die ... 'to die for'? And here it is a bit closer up!
I've got so many samples lined up I may be posting quite a bit for a while! Watch this space!
Tomorrow I'm showing you another new stamp set! And the cards we're making in February's class!
Saturday, 12 March 2016
Stampin' Up! Sunny Saturday - Birthday Blooms
It's a beautiful sunny day here and I'm excited to be going out later to a gig with my friend Lesley and a couple of others... preceded by an Italian meal! Nom Nom!
In the meantime I just had to share this stunning card, sometimes I get flashes of inspiration and I really loved this effect!
I just adore the subtle colours.
Here you can see the raised effect that embossing the Vellum creates - it's a really tactile card.
I cut the frames using the Lots of Labels Framelits.
Have a fabulous weekend!
Paula xxx
In the meantime I just had to share this stunning card, sometimes I get flashes of inspiration and I really loved this effect!
Isn't it beautiful? I used the Birthday Blooms set, my score tool, Blender Pens and Vellum. I've done a video tutorial for you to follow if you would like to have a go...
I just adore the subtle colours.
Here you can see the raised effect that embossing the Vellum creates - it's a really tactile card.
I cut the frames using the Lots of Labels Framelits.
Have a fabulous weekend!
Paula xxx
Saturday, 12 September 2015
Stampin' Up! Wedding Celebrations
Well - I'm not going to be about for the next week so I thought I would share a card I made for my cousin.
It's amazing that I can still remember changing his nappies and him running up the garden with no clothes on as a toddler in the summer!
It's hard to believe he's 30 years on and embarking on a new part of his life with his lovely new wife!
This is the card I made for them to celebrate their wedding.
I stamped the flowers from Birthday Blossoms on Vellum with Versamark and heat embossed with white embossing powder.
The butterflies are cut from Dazzling Diamonds Glimmer Paper.
This time tomorrow I'll be in a Greek bar, Katie will be staying here looking after the cats who will no doubt, as usual, treat her with contempt for as long as it takes to realise she holds the tin opener!
I'll schedule another post for in the week... Something for him!
It's amazing that I can still remember changing his nappies and him running up the garden with no clothes on as a toddler in the summer!
It's hard to believe he's 30 years on and embarking on a new part of his life with his lovely new wife!
This is the card I made for them to celebrate their wedding.
I stamped the flowers from Birthday Blossoms on Vellum with Versamark and heat embossed with white embossing powder.
The butterflies are cut from Dazzling Diamonds Glimmer Paper.
This time tomorrow I'll be in a Greek bar, Katie will be staying here looking after the cats who will no doubt, as usual, treat her with contempt for as long as it takes to realise she holds the tin opener!
I'll schedule another post for in the week... Something for him!
Saturday, 20 June 2015
Steppin' Up with Stampin' Up!
Thank you for joining us on another Pinkies Blog Hop! We're showcasing lots of gorgeous projects using products from the new Stampin' Up!® Annual Catalogue. Simply use the buttons at the end of each post to keep hopping!
Not that you will have noticed [cough] but I have a butterfly 'thing' going on at the moment... so when I saw the gorgeous Watercolour Wings set and matching framelits... especially as a bundle saving 15%, I 'needed' them.
They also co-ordinate with the Butterflies Thinlits. Bonus!!
The first card I made is a clean and simple design, also using the new Lots Of Labels Framelits.
I used the new in-colours - Watermelon Wonder and Tip Top Taupe. I got the colour variations by 'Stamping Off', twice for the lightest shade and once for the middle shade.
Then I thought it would be good to demonstrate how easy it is to 'Step Up' your cards with a few extra techniques and embellishments.
It's essentially the same card in Delightful Dijon... with the addition of some of the new Gold Metallic Thread, embossing on the white layer of the labels, a couple of mats framing the image, the stunning Dotted Lace Trim and the extra, detailed die cut, using Vellum coloured with a Sponge Dauber.
A little tip for you... when stamping and die cutting the butterfly - leave the body until after you have die cut. it is a lot easier to then line it up and not end up cropping bits off.
Thanks for joining me on the Blog Hop, there are lots of other amazing projects from the other Pinkies so please keep hopping using the buttons below.
Paula xxx
Sunday, 7 December 2014
No More - I can't take it!
...the excitement that is! New catalogue and Sale-A-Bration coming soon - but if you want anything for Christmas you need to order now. Last shipping date is 15th December - But I would give it a bit more if you can!
So as a demonstrator I get to see sneak peeks of the new seasonal catalogue and the Sale-a-Bration leaflet - and Oh My! I am so in trouble with my bank manager - but the products are simply amazing. I can't wait to share!
Yesterday I was at a Dabble Day - the opportunity to try 5 new crafts... I had 9 lovely ladies join me at my table and they had great fun. They were so engrossed!
I also showed some items I made recently and this one got a lot of attention...
It's a little votive for a battery operated tea light... doesn't look much? Check it out with the candle inside!
I heat embossed an image from the Hopeful Thoughts set on Vellum, cut the apertures with the Labels Framelits, used the Mosaic and Label Bracket punches.
The butterflies are stamped from Papillon Potpourri, punched using the Bitty Butterfly, coloured with Blendabilities and coated with Crystal Effects...
In fact I have been asked to run a workshop for a group of ladies to make this. I'm really looking forward to it!
If you would like to come to a class - or want me to hold a workshop in your home for you and some friends - please get in touch! Don't forget you can also host a party and you will get hostess credits from your party sales to get free products!
So as a demonstrator I get to see sneak peeks of the new seasonal catalogue and the Sale-a-Bration leaflet - and Oh My! I am so in trouble with my bank manager - but the products are simply amazing. I can't wait to share!
Yesterday I was at a Dabble Day - the opportunity to try 5 new crafts... I had 9 lovely ladies join me at my table and they had great fun. They were so engrossed!
I also showed some items I made recently and this one got a lot of attention...
It's a little votive for a battery operated tea light... doesn't look much? Check it out with the candle inside!
I heat embossed an image from the Hopeful Thoughts set on Vellum, cut the apertures with the Labels Framelits, used the Mosaic and Label Bracket punches.
The butterflies are stamped from Papillon Potpourri, punched using the Bitty Butterfly, coloured with Blendabilities and coated with Crystal Effects...
In fact I have been asked to run a workshop for a group of ladies to make this. I'm really looking forward to it!
If you would like to come to a class - or want me to hold a workshop in your home for you and some friends - please get in touch! Don't forget you can also host a party and you will get hostess credits from your party sales to get free products!
Thursday, 13 March 2014
Sad Times!
Firstly I cannot believe I haven't posted since Sunday... in honesty I can't believe it is Thursday! Where has the week gone? It may have something to do with the fact I work in finance and it was month end last week and we still had forecasts to submit this week. I think it's more likely that I have been spending so much longer outside in the gorgeous sunshine!
It hasn't been a great week for us, one of my husbands customers sadly passed away and we had to have one of our cats (the older one) put to sleep on Monday.
Ever the practical one I wanted to make a card for Chris' customers' husband and so I made this.
You can't really see from this but the image was stamped in Versamark on Vellum and then I used Black embossing powder.
The background was sponged on the Vellum from behind which you can see better on this photo where the light shines through.
Don't forget you can order all the products to make this card from my on-line shop by clicking on the link on the right hand side bar.
I have a few projects I've been working on and I'm just trying to find the time to shoot a short video!
Roll on the weekend!
Paula xxx
It hasn't been a great week for us, one of my husbands customers sadly passed away and we had to have one of our cats (the older one) put to sleep on Monday.
Ever the practical one I wanted to make a card for Chris' customers' husband and so I made this.
You can't really see from this but the image was stamped in Versamark on Vellum and then I used Black embossing powder.
The background was sponged on the Vellum from behind which you can see better on this photo where the light shines through.
Don't forget you can order all the products to make this card from my on-line shop by clicking on the link on the right hand side bar.
I have a few projects I've been working on and I'm just trying to find the time to shoot a short video!
Roll on the weekend!
Paula xxx
Friday, 27 December 2013
More Vellum...
Just before Christmas I posted my Pop Up flower card as an example of something else you can do with Vellum - well today I have a couple more cards to show you with 3 techniques for Vellum.
This first card is the simplest - I have used the World Map background stamp on the Vellum, The Open Sea and Simply Sketched stamps with the Decorative Label punch, the aperture is cut using the Ovals framelits, the Map stamped on the opaque Vellum gives a really interesting background.
For the second card I stamped the Poppy from Simply Sketched on the Vellum - then coloured it with my Blender Pens. I have again used the Decorative Label punch and Ovals framelits. The colouring technique gives a really soft effect.
Lastly - and again really simple but so effective is the use of embossing folders on Vellum. I have used two different ones here - the Adorning Accents and Needlepoint Border.
You will also see I have used the Expressions Thinlits for the word Love... only available until the 1st of February.
Have you noticed the Sneak Peeks I managed to sneak in here? The Decorative Dots embossing folder and the Banner Blast stamp set with coordinating punch will all be available from the end of January - you will be able to select from one of these or the other fabulous items free with orders of at least £45 during Sale-a-Bration.
Anyhow - that's all from me today. I hope you had a lovely Christmas and are looking forward to the weekend as much as I am - especially as I am getting a new hairdo, hubby is off out and I'll have 2 whole days to myself for crafting.
Pxx
This first card is the simplest - I have used the World Map background stamp on the Vellum, The Open Sea and Simply Sketched stamps with the Decorative Label punch, the aperture is cut using the Ovals framelits, the Map stamped on the opaque Vellum gives a really interesting background.
For the second card I stamped the Poppy from Simply Sketched on the Vellum - then coloured it with my Blender Pens. I have again used the Decorative Label punch and Ovals framelits. The colouring technique gives a really soft effect.
Lastly - and again really simple but so effective is the use of embossing folders on Vellum. I have used two different ones here - the Adorning Accents and Needlepoint Border.
You will also see I have used the Expressions Thinlits for the word Love... only available until the 1st of February.
Have you noticed the Sneak Peeks I managed to sneak in here? The Decorative Dots embossing folder and the Banner Blast stamp set with coordinating punch will all be available from the end of January - you will be able to select from one of these or the other fabulous items free with orders of at least £45 during Sale-a-Bration.
Anyhow - that's all from me today. I hope you had a lovely Christmas and are looking forward to the weekend as much as I am - especially as I am getting a new hairdo, hubby is off out and I'll have 2 whole days to myself for crafting.
Pxx
Sunday, 22 December 2013
Pop-Up Flower Card
Whilst poking about on t'interweb on Friday I came across a video and thought - Oooh - that would look so nice with some sponged Vellum... particularly as one of my customers said to me on Saturday "I haven't a clue what to do with Vellum!" I may share a few more tit-bits in the coming days!
So this afternoon I retired to my little craft room with my video camera and shot a little video tutorial for you.
I used the Boho Blossoms Punch, the Bird Builder Punch and the greeting from Blooming with Kindness...
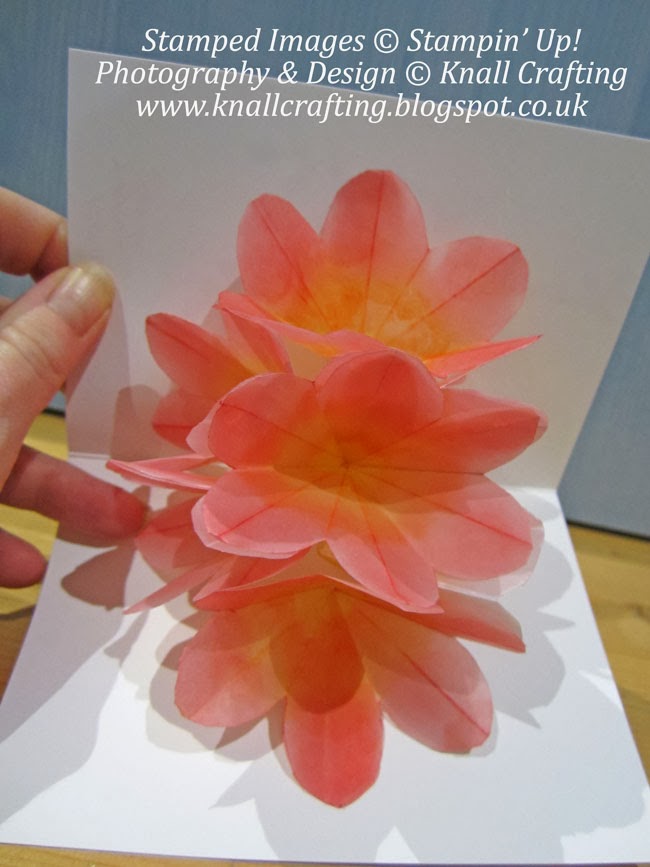
So where's the Pop-Up bit I hear you ask... well here it is!!
Here's a close up of those gorgeous flowers - I expect you could do more with them... and the Video Tutorial is at the bottom of the page - just keep scrolling!
Enjoy - and please leave me a message to let me know how your creations turned out!
How lovely is it to move on from all those posts about Christmas Cards!
So this afternoon I retired to my little craft room with my video camera and shot a little video tutorial for you.
I used the Boho Blossoms Punch, the Bird Builder Punch and the greeting from Blooming with Kindness...
So where's the Pop-Up bit I hear you ask... well here it is!!
Here's a close up of those gorgeous flowers - I expect you could do more with them... and the Video Tutorial is at the bottom of the page - just keep scrolling!
Enjoy - and please leave me a message to let me know how your creations turned out!
How lovely is it to move on from all those posts about Christmas Cards!
Sunday, 8 December 2013
Vellum LED Tealight Decoration - Video Tutorial
So I've seen lots of beautiful things made with Vellum, but I have very little patience and some of them seem very complicated.
I found something similar to these on Pinterest by various people so I decided to adapt them and make my own.
I spent hours last night crafting away and they are really rewarding.
Both the Santa (from Santa's List) and the Poinsettia (Joyful Christmas) are printed directly onto the vellum using MDS (My Digital Studio) which was fabulous as I was able to make them the exact size I wanted. Who would have thought you could print directly on Vellum - not something I ever considered doing previously! The nativity scene is from the 'Best of...' Christmas set as was the reindeer - who is embossed using black embossing powder.
I also added some Dazzling Diamonds... gotta' have sparkle at Christmas!
I'm not very good at colouring but the Vellum makes it so easy - and I couldn't live without my blender pens...
I will apologise that in places things are slightly out of shot. I have a trapped nerve in my neck and am really struggling - even worse now than earlier when I made the video - so there was no way I could re-shoot it - but I really wanted to share so you could all get creating before Christmas.
Have fun!
I found something similar to these on Pinterest by various people so I decided to adapt them and make my own.
I spent hours last night crafting away and they are really rewarding.
Both the Santa (from Santa's List) and the Poinsettia (Joyful Christmas) are printed directly onto the vellum using MDS (My Digital Studio) which was fabulous as I was able to make them the exact size I wanted. Who would have thought you could print directly on Vellum - not something I ever considered doing previously! The nativity scene is from the 'Best of...' Christmas set as was the reindeer - who is embossed using black embossing powder.
I also added some Dazzling Diamonds... gotta' have sparkle at Christmas!
I'm not very good at colouring but the Vellum makes it so easy - and I couldn't live without my blender pens...
I will apologise that in places things are slightly out of shot. I have a trapped nerve in my neck and am really struggling - even worse now than earlier when I made the video - so there was no way I could re-shoot it - but I really wanted to share so you could all get creating before Christmas.
Have fun!
Subscribe to:
Posts (Atom)